Monday, May 22, 2023

Cement Hydration and Concrete Curing

Cement Hydration and Concrete Curing Concrete curing is not simply a matter of the concrete hardening as it dries out. In fact, it is just the opposite. Portland cement is a hydraulic material. That is, it requires water for curing and can, in fact, fully cure to a hardened state even if it is completely submerged in water. Portland cement is anhydrous—it contains no water or moisture at all. The moment it comes in contact with water, a chemical reaction takes place in which new compounds are formed. This reaction is called cement hydration. The rate of hydration varies with the composition of the cement, the fineness of the cement particles, the amount of water present, the air temperature, and the presence of admixtures. If the mixing water dries out too rapidly before the cement has fully hydrated, the curing process will stop and the concrete will not harden to its intended strength. Curing will resume if more water is introduced, but at a slower rate. Hydration occurs more rapidly at higher air temperatures Cement hydration itself generates heat, too. This heat of hydration can be helpful during cold-weather construction, and potentially harmful during hot-weather construction. The chemical reaction between water and cement first forms a paste which must completely coat each aggregate particle during mixing. After a time, the paste begins to stiffen or set, and after a few hours has lost is plasticity entirely. The rate of this setting, however, is not the same as the rate of hardening. A Type-III high-early-strength cement may set in about the same time as a Type-I general-purpose cement, but the Type III hardens and develops compressive strength more rapidly after it has set.


Concrete normally cures to its full design strength in 28 days. Curing is slower in cold weather, and at temperatures below 40°F, the concrete can be easily and permanently damaged if it is not properly protected. Concrete must be kept moist for several days after it is placed to allow the portland cement in the mix to cure and harden properly. Concrete that is not kept moist reaches only about 50% of itsdesign strength. The Figure shows the differences in concrete strengthfor various periods of moist curing. If it is kept moist for at least three days, it will reach about 80% of its design strength, and for seven days, 100% of its design strength. If the concrete is kept moist for the full 28- day curing period, it will reach more than 125% of its design strength.


Sunday, January 8, 2023

LEED FOR RESIDENTIAL BUILDINGS


LEED is a rating system developed by the United States Green Building Council. The rating system outlines important sustainable design features that residential buildings should incorporate, and provides a scoring system to rank success. The rating system is available on the USGBC website, (www.usgbc.org/leed/ratingsystems). The LEED rating system for residential buildings provides a guideline process for architects and builders to produce a more sustainable product.


The LEED for homes checklist is extensive. It starts with innovation in the design process, and then proceeds through site issues, water issues, energy and atmosphere issues, material issues, indoor environment issues, and finally awareness for the owner and the public. A detailed checklist is available on the USGBC website at new.usgbc.org/leed/rating-systems. The following is a summary of the main sections of this rating system.


The innovation and design process section has a total of 11 points and includes integrated project planning, durability management, and innovative or regional design opportunities. This section reinforces the importance of including all the design professionals early in the design process so innovation can happen. The location and linkages section has a total of 12 points and includes site selection, preferred locations, infrastructure, community resources, and access to open spaces. These criteria are echoes of New Urbanism concepts of walkable communities linked by mass transit.


The sustainable sites section has a total of 22 points and includes site stewardship, landscaping, local heat island effects, surface water, nontoxic pest control, and compact development. This section is focused on responsible landscaping with plants that can survive in the location without extensive watering and also awards points to dense development that uses up less land per house.


The water efficiency section has a total of 15 points and includes water reuse, irrigation systems, and indoor water use. Here the focus is minimizing water use through efficient fixtures, efficient irrigation, and possible gray water reuse.


The energy and atmosphere section has a total of 38 points and includes sections on insulation, air infiltration, windows, the heating and cooling equipment and distribution, the water heater, lighting, appliances, renewable energy, and refrigerant management. This section has the highest point total because reducing energy use is very important. A review of the list above indicates that reducing energy use requires extensive attention to detail across many areas of the home design.


The material and resources section has a total of 16 points and includes material efficient framing, environmentally preferable products, and waste management. This section addresses the material choices to be incorporated in the home and the environmental efficiency of the construction process.


The indoor environmental quality section has a total of 21 points and includes combustion venting, moisture control, outdoor air ventilation, local exhaust, distribu tion of heating and cooling, air filtration, contaminant control, radon protection, and garage pollutant protection. Indoor environmental quality is an increasingly important issue as homes are designed to be more air tight to reduce energy use. This section addresses this problem with an extensive list of requirements and a significant number of points to be gained.


The final section is awareness and education, which has a total of 3 points and includes education of the home owner and or tenant, and education of the building manager. The final section only has 3 points but it is very important that the users of a high performance home or multifamily building understand what they have and how to appropriately use the features provided.


This list is extensive and all of it is good practice. Even if it is only used as a guideline to good practice with no intention of applying for the formal rating from the USGBC, the architect, builder and eventual homeowner, tenant, building manager, and or building owner will be well served.


Thursday, September 1, 2022

Concrete Mix Designs

For work requiring more than one cubic yard of material, concrete is usually ordered from a ready-mix supplier for delivery to the job site. The supplier will need to know the minimum compressive strength, the maximum aggregate size, and any special requirements such as air entrainment for added freeze-thaw durability. The supplier will then select a mix design that is appropriate for your needs. If you are mixing small batches of concrete on site, you will need to understand the basic principles of concrete mix design yourself. The proportion of dry ingredients and the ratio of water to cement are the two most important factors.


Cement and aggregates provide strength, durability, and volume stability in concrete, but too much or too little of one in relation to the other reduces quality.


■ Lean or oversanded mixes with low cement content and high aggregate proportions are harsh and have poor workability.

■ Fat or undersanded mixes with high cement content and low aggregate proportions are sticky and expensive.


Within the range of normal concrete strengths, compressive strength is inversely related to water content. That is, the more water you use, the lower the concrete strength. But increasing water content increases fluidity and workability. Since water is required for workability, and since workability is required for high-quality concrete, the low water requirements for strength and high water requirements for workability must be balanced. The ratio of water to cement is the weight of water divided by the weight of cement. Water-cement ratio affects the consistency of a concrete mix. The consistency, in turn, affects how easily the concrete can be poured, moved around in the forms, compacted, and finished. Up to a point, a mix with more water is easier to work with than one that has less water and is therefore stiffer. Too much water, though, will cause the ingredients to separate during the pouring, placing, and handling and will destroy the integrity of the concrete. Too much water also lowers strength, increases the porosity and water permeability of the cured concrete, and makes it more prone to shrinkage cracking. The trick is to use enough water to make the fresh concrete workable, but not so much that it creates weak or porous structures.


Air content for ready-mix concrete should generally be 3 to 6-1/2%, depending on the maximum aggregate size (see Figure below). Concrete that is batched on site can be made with either an air-entrained cement or an air-entraining admixture. Using an air-entrained cement will yield an air content within the proper range. When using a separate airentraining agent, carefully follow the manufacturer’s instructions to determine the correct amount to add to the mix. For job-site mixing, air-entrained cement is usually easier to work with.


It is easier to measure concrete consistency or slump than to calculate water-cement ratio. The concrete mix consistency produced by adding various amounts of water is measured by slump tests in which fresh concrete is poured into a special mold called a slump cone. You can buy one from a building supply yard. Place the concrete into the cone in three layers. Tamp each layer with a metal rod to assure that it is completely consolidated and does not contain air pockets. When the cone is full, scrape off any excess concrete, leaving a level top. Then remove the cone and measure the amount of slump or settlement with a rod and ruler (Figure 2-11). The wetter the mix, the higher the slump measurement, and the drier the mix, the lower the slump measurement. The slump recommended to assure proper water-cement ratio for residential concrete is 3 to 5 inches. Slump tests can also be used to ensure consistent mixes from batch to batch.


As a general guideline for ordering ready-mix concrete, Figure 2-12 shows recommended mix requirements for various exposure conditions. The weathering regions indicated on the map are intended only as a guide. Particularly in mountainous regions, local conditions can change within a very short distance and may be more or less severe than indicated by the region classification. Severe exposures are those in which deicing salts are used because of significant snowfall combined with extended periods in which natural thawing does not occur. If you are in doubt about which classification applies, always use the more severe exposure. Actual concrete ingredient proportions can be measured either by volume or by weight.


Tuesday, April 19, 2022

ELEMENTS OF A BUILDING


The following are the basic elements of a building:


  1. Foundation
  2. Plinth
  3. Walls and columns
  4. Sills, lintels and chejjas
  5. Doors and windows
  6. Floors
  7. Roofs
  8. Steps, stairs and lifts
  9. Finishing work
  10. Building services.


The functions of these elements and the main requirement of them is presented in this article.


1. Foundation: Foundation is the most important part of the building. Building activity starts with digging the ground for foundation and then building it. It is the lower most part of the building. It transfers the load of the building to the ground. Its main functions and requirements are:

(a) Distribute the load from the structure to soil evenly and safely.

(b) To anchor the building to the ground so that under lateral loads building will not move

(c) It prevents the building from overturning due to lateral forces.

(d) It gives level surface for the construction of super structure.


2. Plinth: The portion of the wall between the ground level and the ground floor level is called plinth. It is usually of stone masonry. If the foundation is on piles, a plinth beam is cast to support wall above floor level. At the top of plinth a damp proof course is provided. It is usually 75 mm thick plain concrete course.


The function of the plinth is to keep the ground floor above ground level, free of dampness. Its height is not less than 450 mm. It is required that plinth level is at least 150 mm above the road level, so that connections to underground drainage system can be made.


3. Walls and Columns: The function of walls and columns is to transfer the load of the structure vertically downwards to transfer it to foundation. Apart from this wall performs the following functions also:


(a) It encloses building area into different compartments and provides privacy.

(b) It provides safety from burglary and insects.

(c) It keeps the building warm in winter and cool in summer.


4. Sills, Lintels and Chejjas: A window frame should not be directly placed over masonry. It is placed over 50 mm to 75 mm thick plain concrete course provided over the masonry. This course is called as sill. Lintels are the R.C.C. or stone beams provided over the door and window openings to transfer the load transversely so as to see that door or window frame is not stressed unduly. The width of lintels is equal to the width of wall while thickness to be provided depends upon the opening size. Chejja is the projection given outside the wall to protect doors and windows from the rain. They are usually made with R.C.C. In low cost houses stone slabs are provided as chejjas. The projection of chejja varies from 600 mm to 800 mm. Sometimes drops are also provided to chejjas to improve acsethetic look and also to get additional protection from sun and rain.


5. Doors and Windows: The function of a door is to give access to different rooms in the building and to deny the access whenever necessary. Number of doors should be minimum possible. The size of the door should be of such dimension as will facilitate the movement of the largest object likely to use the door.


Windows are provided to get light and ventilation in the building. They are located at a height of 0.75 m to 0.9 m from the floor level. In hot and humid regions, the window area should be 15 to 20 per cent of the floor area. Another thumb rule used to determine the size and the number of windows is for every 30 m3 of inside volume there should be 1 m2 window opening.


6. Floors: Floors are the important component of a building. They give working/useful area for the occupants. The ground floor is prepared by filling brick bats, waste stones, gravel and well compacted with not less than 100 mm sand layer on its top. A lean concrete of 1 : 4 : 8, 100 mm thick is laid. On this a damp proof course may be provided. Then floor finishing is done as per the requirement of the owner. Cheapest floor finish for a moderate house is with 20 to 25 mm rich mortar course finished with red oxide. The costliest floor finish is mossaic or marble finishing.


Other floors are usually of R.C.C. finished as per the requirements of the owner.


7. Roof: Roof is the top most portion of the building which provide top cover to the building. It should be leak proof.


Sloping roof like tiled and A.C. sheet give leak proof cover easily. But they do not give provision for the construction of additional floor. Tiled roof give good thermal protection.


Flat roofs give provision for additional floors. Terrace adds to the comfort of occupants. Water tanks can be easily placed over the flat roofs.


8. Step, Stairs and Lifts: Steps give convenient access from ground level to ground floor level. They are required at doors in the outer wall. 250 to 300 mm wide and 150 mm rise is ideal size for steps. In no case the size of two consecutive steps be different. Number of steps required depends upon the difference in the levels of the ground and the floor. Stairs give access from floor to floor. They should consists of steps of uniform sizes.


In all public buildings lifts are to be provided for the conveniences of old and disabled persons. In hostels G + 3 floors can be built without lifts, but in residential flats maximum floors permitted without lifts is only G + 2. Lift is to be located near the entrance. Size of the lift is decided by the number of users in peak hours. Lifts are available with capacity 4 to 20 persons.


9. Finishing: Bottom portion of slab (ceiling), walls and top of floor need smooth finishing with plaster. Then they are provided with white wash, distemper or paints or tiles. The function of finishing work is:


(a) Give protective cover

(b) Improve aesthetic view

(c) Rectify defective workmanship

(d) Finishing work for plinth consists in pointing while for floor it consists in polishing.


10. Building Services: Water supply, sanitation and drainage works, electric supply work and construction of cupboards and show cases constitute major building services.


For storing water from municipal supply or from tanker a sump is built in the house property near street. From the sump water is pumped to over head tanks placed on or above roof level so as to get water all the 24 hours. Plumbing work is made so as to get water in kitchen, bathrooms, water closets, sinks and garden taps.


For draining rain water from roofs, down take pipes of at least 100 mm diameters should be used. Proper slopes should be given to roof towards down take pipe. These pipes should be fixed at 10 to 15 mm below the roof surface so that rain water is directed to the down take pipe easily.


The sanitary fittings are to be connected to stone ware pipes with suitable traps and chambers. Stone ware pipes are then connected to underground drainage of municipal lines or to the septic tank.


Many carpentry works are required for building service. They are in the form of showcases, cupboards, racks etc.


Electric supply is essential part of building services. The building should be provided with sufficient points for supply of lights, fans and other electric gadgets.

Friday, December 17, 2021

Building Innovations

According to industry experts, matters of energy efficiency, innovative building technologies and evolving design trends are the key factors shaping our homes as we enter 2020. Prefab construction is a growing trend, with the advantages of quality control, design flexibility and reduced labour costs making it a highly desirable choice — for new builds in particular.


Energy efficiency continues to be a high priority as home builders look to offset rising energy costs and find a more eco-friendly construction footprint. Glazing is one of the biggest arenas tackling this concern, along with thermally efficient green building materials and the wide use of water-wise fittings and fixtures in order to conserve water.


In home design trends, experts are predicting that the current thirst for clean lines and a minimalist aesthetic will continue to meet the needs of Australian homeowners as we move into a new decade. Innovations in small space design will surge as block sizes get smaller and vertical living increases — making balconies and courtyards the new greenspace of an increasingly urban population. And home automation will become more commonplace as we take control of our living environment and automate everything!


1. HEMPCRETE

HEMPCRETE


The market for green building products is a growth market (no pun intended). Eco-conscious home builders everywhere are seeking materials that result in a non-toxic habitat with a low environmental impact, are sustainable, and offer improved thermal efficiency for future energy savings. Luckily for these conscientious people, the range of eco-friendly construction materials available today tick many of these boxes, including hempcrete.


A biocomposite material made from hemp shiv (the inner woody core of the industrial hemp plant) and lime, hempcrete is used to construct insulating walls, floors and roofs, or make construction blocks and panels. A sustainable building product, it produces excellent thermal insulation that results in reduced energy consumption.


Hempcrete is BAL FZ-rated for use in bushfire prone areas and is termite and mould resistant. It is also permeable or ‘breathable’, regulating indoor humidity by absorbing/desorbing water vapour to provide a comfortable and healthy interior atmosphere, and locks in carbon (approx. 100kg of carbon per square metre of hempcrete).


Presenting a textured finish in its natural state that is both attractive and durable, hempcrete can also be covered with a render to achieve a smoother, more modern aesthetic if desired.


Dedicated to the use of sustainable and eco-friendly materials, hemp building specialist Hemp Lime Constructions (HLC) use Tradical®Hempcrete in their work. A highperformance, low impact building method, hempcrete allows HLC to meet the needs of its most discerning clients while staying true to its commitment to bio-based construction.


2. ENERGY-EFFICIENT GLAZING

ENERGY-EFFICIENT GLAZING


Taking up a large percentage of a home’s surface area, glazing is a major construction consideration contributing to security and thermal efficiency. With up to 40 percent of a home’s heat loss and up to 87 percent of its heat gain occurring via windows, it is essential that well-engineered glazing be expertly fitted to ensure optimal energy gains. In addition, superior window design provides a solid security measure and ensures the architectural vision of a home.


Setting the benchmark in energy efficient glazing since 1990, Paarhammer windows and doors are custom made in Australia to meet structural performance and water penetration standards of the highest level. Unique framing, sealing and secure metal-to-metal locking systems, combined with double or triple glazing, produce windows and doors with high sound protection and premium energy efficiency.


Suitable for passive house construction, with a variety of glass options including Low-E and switchable I-glass, Paarhammer’s Architectural Timber Range of high performance windows offer design excellence and unparalleled security and strength.


With natural insulation properties, timber is both versatile and attractive. Available in a variety of plantation grown timbers, including FSC® certified timber, and offering a range of styles from tilt n’ turn windows to sliding doors, Paarhammer’s Architectural Timber collection can be custom designed to fit everything from modern constructions to heritage renovations.


3. INFRARED SAUNAS

INFRARED SAUNAS


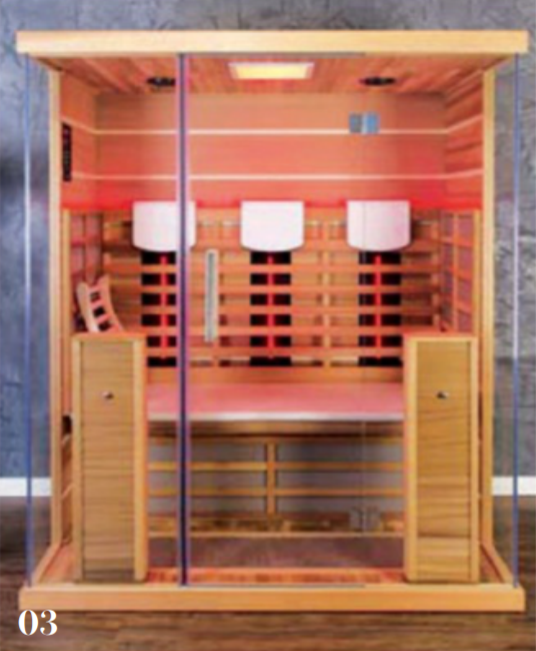
More than just a Scandi design influence, infrared saunas offer a plethora of health benefits relevant to combatting today’s concerns regarding health and wellbeing.


Whether it’s dealing with pain from arthritis, managing conditions such as fibromyalgia or injury related pain, saunas have long proven an effective method in the relief of symptoms. Saunas have also been proven to increase blood circulation, cleanse the skin, relieve stress, improve quality of sleep, aid in recovery after exercise, and contribute to weight loss for overall improved health.


The growing interest in building saunas into Australian homes can be attributed to our belief in the benefits of a healthy lifestyle, making a personal infrared sauna an investment not only in good health but also in your home’s value.


Infrared saunas work by heating the body directly, penetrating into the skin and increasing cardiovascular output that in turn removes heavy metals and toxins from the body through sweat.


With an interestin supporting health and wellbeing, iHealth Saunas offer a collection of quality infrared saunas to meet a range of needs. From a compact unitideal for apartments to a spacious three-person unit, each iHealth sauna can be safely constructed into any home. Builtto Australian electrical safety standards, each unit’s high-efficiency, low-EMF carbon heating element effectively disperses infrared energy across a wide surface area for a cost-effective and comfortable sauna experience.


4. SOLAR ENERGY

SOLAR ENERGY


With the demand for cost-effective and eco-friendly energy options on the rise, solar power solutions for home energy needs is a burgeoning industry. In a country where sunshine reigns day after day, solar power is a solid investment, and today’s advancements in technology are making it easier for households to participate.


Recently launched in Australia by SENEC, the Home V3 Hybrid solar battery is a revolution in home energy consumption, providing households with up to 90 percent solar-power self-sufficiency, saving thousands a year in energy costs with excess power pumped back into the grid.


Of the 20 percent of homes in Australia fitted with solar panels, only 3 percent had batteries connected at the time of installation — usually due to a lack of benefits that warrant the price. The new generation SENEC hybrid solar battery delivers a range of benefits never seen before, including a 20-year warranty, combined PV inverter and battery inverter, PV overvoltage protection safety, three-tier remote monitoring, unlimited solar recharging cycles, and retrofit capacity.


Designed, engineered and manufactured in Germany, the SENEC Home V3 Hybrid battery takes up just 0.29m2; a compact unit that is easily installed without specialist tools. An intelligent management system, this hybrid solar battery is a revolution in energy storage and consumption.


5. PREFAB PRECISION

PREFAB PRECISION


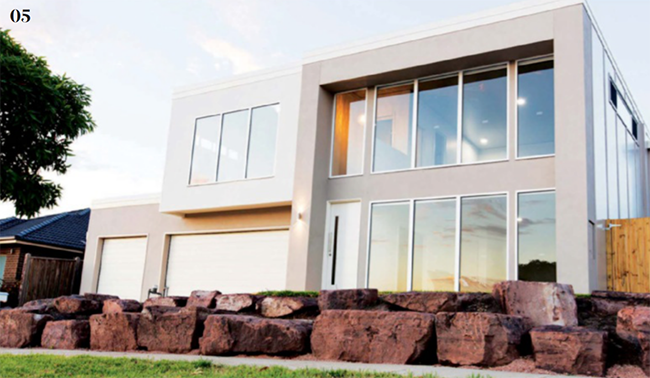
Insulated wall panel and cladding products are the leading-edge frontier in residential and commercial construction. Reducing building costs via improved manufacturing methods and reduced onsite labour costs, prefab construction materials are a cost-efficient and sustainable method of erecting a house in today’s competitive and eco-conscious market.


Taking prefab seriously, Bondor, a leader in complete thermal building solutions, produce LuxeWall®; a lightweight architectural walling system. Admired for its range of luxury finishes and high-performance insulation options, LuxeWall®offers builders a sustainable choice that helps them meet project timeframes and budget parameters.


Suitable for use as a feature wall, decorative façade or upper/lower storey walling, LuxeWall ®(50mm and 75mm) is a Codemark® accredited concealed fix system, finished with the market-first UniSmart architectural trim and capping system.


LuxeWall® (50mm) has a 60 minute fire rating (FRL 60/60/60) for residential applications when used as a boundary wall system, and is suitable for multiresidential and commercial use that requires a 90 minute fire rating (FRL 90/90/90).


With excellent thermal efficiency properties, this pre-finished walling product is versatile and offers flexibility to meet a range of needs. Able to take a range of matte and metallic painted finishes or texture coatings, LuxeWall®provides the freedom to achieve a plethora of design visions and meet council or developer requirements.


To find the right combination, consult with Bondor to guarantee LuxeWall® meets your building and design specifications.


Is The Future of Construction Modular?

Is The Future of Construction Modular?


Prefabrication of parts and off-site construction of modules has been a practice for more than 10 years. However, in the last couple of years, we’ve seen changes in the construction industry move more towards bringing the work in-house.


La Trobe Tower in Melbourne, with 44 storeys and standing at 133m, is now officially Australia’s tallest prefabricated building. The residential tower was constructed in only 16 months. Similar projects are going on in the UK and the US.


The experts behind all these projects share the same vision: the future is modular. They believe the technology needed to have modular construction finally exists and they plan to show it. The problem is that many people still don’t believe in this way of building, even though, since the 1990s, government reports were saying that modular construction is safer and faster, while not compromising the quality of the construction.


Unfortunately, the majority of buildings worldwide are still made the old-fashioned way — on site. What keeps the hope of having a modular future alive is many large-scale projects around the world that are built using this technology. Projects such as Google Headquarters, which was designed by Bjarke Ingels; Creekside Wharf in Greenwich, which is the tallest modular structure in the UK; and the La Trobe Tower, which is the highest in Australia.


The benefits of modular construction are any. It is a safer way of building but at the same time it can be both cheaper and faster. Contractors are now able to start working on foundations on-site and start with the manufacturing process in the factory. Experts have calculated this can enable projects to be finished up to 50 per cent faster than with traditional construction.


Furthermore, modular construction and prefabrication lowers the amount of material waste, plus it allows constructors to continue production even in bad weather. This type of development also enables us to rethink the use of buildings since, in the future, modular structures could be disassembled and shipped to other locations for reuse.


The experts find modular construction to be excellent when it comes to managing quality. Whatever is manufactured on-site can vary in quality, especially if the builder doesn’t have strict quality control. However, when you produce something in a factory, it is easier to establish control over quality and make sure that every single modular piece is up to standard.


On the other hand, the builder will have to worry about the transport of modular elements from the factory to the construction site. Tolerances would have to be higher in the factory since every module needs to be shipped.


So, what’s slowing down the adoption of modular construction? The benefits are apparent but it’s still far from everyday use. Experts agree there are many reasons for this, most of them being economical, technical and financial.


Currently, there aren’t enough experts who can be present on the construction site to monitor a build. Traditional construction enables you to adjust everything you need on-site during the build. The fact that the industry is hesitant to adopt this new technology means there’s no need yet for experts in this field.


Another issue builders have is that modular construction requires a company to have its own factory to make modules. Construction companies don’t hesitate to invest, but this kind of upfront investment requires lots of funds that may or may not pay off in the longterm. For a factory like this to be economically viable, it needs to have consistently highvolume turnover.


Finally, it’s the market that drives the change. In post-war Europe, modular construction was the best solution for urban areas as it was fast and efficient. At that time the demand for housing was high but there simply weren’t enough skilled workers to work on-site


THINK OUTSIDE THE BOX


A great example of modern prefabrication being used in construction is the Crowne Plaza hotel extension at Changi Airport. Singapore’s construction regulator stated that at least 65 per cent of tower superstructures must use PPMC (prefabricated prefinished modular construction). The PPMC helped lower the number of workers required on-site by 40 per cent. Furthermore, the construction of one floor took three to four days, instead of two to three weeks.


Designers have been interested in modular construction for a long time. They are fascinated by the possibility of adding new modules where needed, or for their structures to be able to adapt to everchanging urban environments. It all points to the construction industry of the future being modular. As the robot technology develops, one day it will enable fast and accurate production of prefabricated modules. As the manufacturers and designers around the world are getting familiar with the technology, we might see some new and exciting structures being built. The market is always looking for novel and cheaper ways to build. In a world where there aren’t enough skilled workers, modular might be the way to go.


Designers and manufacturers are slowly embracing the idea and with the current lack of skilled workers available to carry out traditional house builds, prefab buildings might just be the solution.


Monday, November 1, 2021

The Role of Green Buildings Related to Energy and Water

The Role of Green Buildings  Related to Energy and Water

There is no single solution to the critical supplies of energy and water and the environmental threats created by their overuse. Therefore, it is necessary to pursue a wide variety of options to reduce use of traditional sources of energy and water.

Buildings are one of the most attractive targets for implementing alternative approaches. Investments in reducing energy and water use quickly pay off by lowering utility bills. In most cases, the savings will return the initial costs (i.e., achieve payback) in a few years.

Even though they can provide building owners with significant savings, the design team has traditionally had a hard time selling increased first - cost investments, because capital building budgets and operating budgets are typically managed and accounted for separately. Building owners and the environment can benefit when management takes a holistic approach and views the two budgets as a single pool of money. First cost, life - cycle cost, maintenance costs, as well as the payback period, should all be an initial part of designing, constructing, and operating a building.

There are other advantages to well - designed buildings that save energy and water (Tiller and Creech 1999), for example:

  • Increased comfort
  • Improved durability
  • Less space occupied by ductwork and piping
  • Reduced fading of textiles in front of window areas
  • Better indoor air quality
  • Reduced square footage, yielding fewer resources used, reduced construction waste, and reduced resources associated with building operation

In many cases, more efficient buildings, particularly those that use natural daylighting, provide benefits that far exceed the energy savings (Wilson 1999a), including:

  •  Improved productivity
  •  Reduced absenteeism
  •  Higher employee morale
  •  Improved test scores in daylighted schools
  •  Increased product sales in retail applications

A report on thirty - three green buildings in California estimated their financial costs and benefits. The estimated additional cost for the buildings was about 2 percent of construction costs — around $4 per square foot. The projected savings per square foot included $5.50 in energy savings, $0.50 in water savings, and $8 in reduced cost for operations and maintenance. The analysis estimated an additional savings of $35 per square foot for enhanced productivity and improved health. Overall, the savings far outweighed the additional costs (Kats 2003). 

The net result of a successful design process for a green building is a structure that initially costs little, if any, more than a comparable traditional building and that provides its occupants tangible improvements in their living and working environments. Since the building uses less energy and water, it will have substantially less negative environmental impact and will serve as a model for future buildings. The end product is a building that is easier to market and, therefore, perceived favorably by the client. Smart businesses recognize the added benefits and are more willing to pay extra for their monthly leases (Kats 2003).

The Role of the Interior Design Professional

Interior designers serve in a unique role in the design process. They combine art and science by using knowledge of technology and psychology to support their expertise in aesthetics, space planning, traffic flow, lighting design, and materials and to respond to client preferences. Interior designers who place a high priority on green building design have an opportunity to change every building on which they work. The more members of the design team committed to green building features and willing to collaborate in a team approach to design, the more likely the initial environmentally responsible concepts will continue through to building occupancy.

Unfortunately, many design projects that begin as green buildings lose key features during the multiple phases (e.g., design development, bidding, value engineering, construction, final occupancy, operations, and maintenance) of the design process. This is due to budget cuts; lack of information, knowledge, and understanding, as well as contractors who are reluctant to try something different than the well - trod approach. 

Interior designers should consider the building as a system and use integrated design approaches to optimize performance and economics. The design team must realize that in the design and construction phases, through the use of integrated systems, all of the disciplines are interrelated. In some cases, eliminating just one design feature in an integrated design may sacrifice key elements of a high - performance building, such as thermal comfort, control of moisture, provision of quality indoor air, energy and water savings, or minimal environmental impact.

The design team often looks to the interior designers to make the building as appealing as possible to the client and end users. When the client wants a green building, the interior designers should consider part of their role to be preserving and honoring the green building features. By remaining firm on the initial design, interior designers can often make a difference not only in one building but in the future string of buildings constructed by the client and design team. 

Monday, April 12, 2021

Environmentally Lighting Design Strategies

Several approaches to energy - effective and energy - efficient lighting have been proposed by noted lighting experts. Nancy Clanton suggests six aspects of lighting to focus on to achieve a low - power density (i.e., watts used per square foot):

1.     Quality daylight

2.     Ambient, task, and accent lighting

3.     Light - colored surfaces

4.     Energy - efficient lighting equipment

5.     Combination of automatic and manual lighting controls

6.     Light surfaces, not volumes

The Advanced Building Systems Integration Consortium, Center for Building Performance and Diagnostics (ABSIC/CBPD), provides seven guidelines for high performance lighting (Center for Building Performance and Diagnostics n.d.):

1.     Daylight-dominant lighting

2.     Task lighting and ambient lighting

3.     Indirect - direct lighting

4.     High-performance luminaires

5.     Plug-and-play fi xtures

6.     Dynamic zoning and advanced controls

7.     System integration

The ABSCIC/CBPD also has twelve major decisions for other interior systems.

A set of strategies to achieve energy - effi cient lighting has been presented by Minnesota Department of Public Service in Commercial Building Lighting Standards: Educational Project (1993). The focus is on six aspects of lighting (needs, hardware, daylighting, control, maintenance, and operations scheduling) and defi nes action items for each:

1.     Lighting needs (tasks and illumination requirements)

·        Identify visual tasks and locations.

·        Group task with same illuminance requirements.

·        Properly locate luminaires to provide light to tasks.

·        Consider light colors for walls, floors, ceilings, and furniture.

2.     Lighting hardware (lamps and luminaires)

·        Install lamps with higher efficacy .

·        Investigate the use of reduced wattage lamps in existing luminaires when illuminance levels are greater than recommended .

·        Consider reduced - wattage fl uorescent lamps in existing luminaires.

·        Consider replacing existing low - wattage incandescent lamps with fewer high - wattage incandescent lamps or compact fluorescent lamps.

·        Assess luminaire effectiveness for lighting [distribution and efficiency].

·        Consider energy - effi cient, electronic ballasts.

·        Consider using heat - removal luminaires.

3.     Daylighting

·        Use daylighting when it is appropriate.

·        Coordinate the plan organization to maximize the use of daylighting.

·        Assess which daylighting tasks are critical and noncritical (indirect, reflected, or filtered daylight vs. direct sunlight).

·        Maximize the effectiveness of fenestration and shading controls.

·        Consider the use of light colors (see above).

·        Increase the distribution of light deep into the space by using light shelves and light - colored room surfaces.

·        Integrate electric lighting with daylighting design.

4.     Light controls

·        Install switching to adjust illumination levels to activity requirements.

·        Consider occupancy sensors to turn lights on and off as room occupancy varies.

·        Consider the use of dimming systems to adjust illumination levels.

·        Consider the use of time clocks to adjust lighting with occupancy schedule.

5.     Lighting maintenance

·        Evaluate the present lighting - maintenance program.

·        Clean luminaires and replace lamps on regular maintenance schedule.

·        Replace outdated or damaged luminaires.

6.     Operating schedules

·        Analyze lighting use during working and building - cleaning periods.

·        Light building for occupied periods only and as security requires.

·        Try to schedule routine building cleaning during occupied hours.

·        Restrict night parking to specific lots.

Environmentally responsible lighting design that is both energy effective and energy efficient becomes easier and more achievable with better products and processes.

The contribution of ERLD to environmentally responsible interior design can be substantial.

Sunday, February 28, 2021

Lighting Controls in the Environmentally Responsible Design

Lighting controls provide one of the easiest ways to increase the energy efficiency of the lighting system. Conservation of energy through the use of controls occurs by integrating daylighting with electric lighting, turning off unneeded lights, and reducing peak - demand electricity usage. Additional energy savings occur when light levels are controlled as part of lamp - lumen adjustment and adaptation compensation. Control strategies need to integrate with the building design, HVAC system, and building - use patterns for full effectiveness.

Three major objectives for using light control are to: (1) reduce light energy use and cost, (2) improve the function and aesthetics of the space for the occupants, and (3) aid in code compliance. Achieving these objectives is easier with advances in lighting - system controls technology that provide options for flexibility and function.

Controls can range from simple switches and dimmers to more advanced sensors and timers and even more complex building - automation systems. Integration of controls in new construction is assumed, but retrofi tting is a viable energy - saving option for existing spaces. The energy savings from lighting controls is estimated to be up to 50 percent in existing buildings and 35 percent in new building. Savings of this magnitude are dependent on the control system being used. Thus, a thorough analysis of the use of the space and the expectations of the occupants is an important component of the control - design process. To be effective, the system must accommodate the occupants ’ use patterns, their commitment to energy savings, and their ability to cope with the control system. The Lighting Controls Association (n.d.) Web site has considerable information available on selecting and using controls, including a room -by-room analysis.

A distinction is made between lighting - control strategies and lighting - control devices in Lighting Controls: Patterns for Design. The planned approach to the control of light is a strategy, while a device is the equipment used to achieve the desired control. Different devices may be used to achieve a lighting - control strategy. Lighting strategies include seven approaches:

1. Occupancy response is appropriate where lights are turned on when needed and turned off when occupancy or a task does not need the light. Control devices for this strategy include:7

  • Manual off/on switch : The simplest lighting control device, requiring user control, has limited adaptability.
  • Occupancy sensor: Detects motion in a space and turns lights off when the space is unoccupied. This automatic control device is useful where the occupancy pattern is unpredictable. There are several variations including:

1.     -Passive infrared (PIR) : Requires a direct “ line of sight ” with a 15 to 20 foot effective distance and 40 foot maximum.

2.     Active ultrasonic (ULT): Good in irregular spaces but can pick up false signals.

3.     PIR/ULT dual technology: Useful in large spaces. Options include a manual on/off override that provides maximum savings when used with PIR or ULT. Systems with only auto - on/auto - off are most appropriate in common-use spaces, such as restrooms and corridors. Use of sensors with HID lamps should be restricted to a high - low option due to the long restrike time if these lamps are turned completely off.

2. Prescheduled or timed response has lights turned on and off on a predetermined, regular schedule or automatically turns lights off after a preestablished time period. Exact light levels are set for time periods that may be varied within a day, week, month, and/or seasonal cycle. Control devices include:

  • Timer : Inexpensive and easiest control device to install; useful in short - occupancy spaces.
  • Time clock : Range from a simple mechanical to complex, programmable electronic units covering 356 days. Variations include:

1.      24 - hour or 7 - day time clocks

2.      Astronomical time clock that adjusts on/off times to sunrise/sunset times 

While rapid - start fluorescent lamp life may be decreased with frequent switching, the calendar replacement time for lamps may not be affected since the lamps are off more time. The energy saved by turning off lamps for periods of time far offsets (by more than three times) the cost of relamping, that is, replacing the lamps (Rundquist et al. 1996).

3. Tuning involves adjusting the light level to match users ’ needs or desires, which may vary with daylight availability, personal preferences, and energy awareness. Two variations of this strategy are task tuning, which involves individualized light control in a work space, and manual dimming, which involves light - level control of a large space. Since light levels that are turned down 25 percent are not noticed by occupants, the potential for a direct energy savings is obvious. Avoid systems that have abrupt changes in light levels, as this annoys occupants. Two approaches to tuning are:

  • Continuous dimming : Reduces both light output and energy consumption. Automatic dimming integral with photoelectric sensors should be used in daylighting control systems.

1.      Linear fluorescent and some compact fl uorescent lamps can be dimmed, typically down to 1 to 5 percent of the lamp output, if matched with dimming ballasts. Using electronic ballasts and dimming controls, the energy saved and light - level reduction are almost proportional (Wilson 2004). Lamp life may be decreased with extensive dimming. Some dimming ballasts can be “ addressed ” : their dimming level is preset and achieved automatically by the push of a button on the control.

2.      Incandescent lamp dimming saves energy and extends the lamp life, while warming the color of the light. A 20 percent reduction in energy results in about a 50 percent reduction in light output, so the savings from dimming is less than with fl uorescent lamps. Low - voltage lamps need the dimmer matched to the transformer. Low - voltage lamps using a dimmer need to be burned at full power periodically to activate the halogen cycle.

3.      HID dimming is more problematic, requiring both a special ballast and a dimming device. An abrupt change in light level results in a color shift for metal halide lamps. Due to advances in fl uorescent light technology and controllability, dimmable HID lighting is not recommended for indoor applications (Wilson 2003).

  • Stepped or multilevel switching : Turning off a portion of the lamps in a multilamp luminaire or banks of lights in a space, based on activity needs or daylight availability. This is a cost - effective means of reducing the light in increments. This reduction is accomplished by switching individual ballasts and lamps or by reducing the power load to the ballast. Multilevel ballasts can be used with HID to change the light output in steps. Stepped switching can be a low - cost method of providing some adjustment in light levels in a space.

4. Daylighting requires a response that adjusts the use of electric light to the amount of daylight available in interior spaces. As noted earlier, daylight will vary due to weather conditions, time of day, and season. Control is gained by the detection of daylight illuminance at a sensor that is integrated with the switching and dimming systems described above. Photoelectric control systems include:

  • Photo switch (or photocell): Generally unacceptable in interior spaces due to the abrupt change in light level with on/off switching. In locations with uniform daylight conditions and in spaces where daylight levels are well above the target levels, these devices may be acceptable and can save more energy than using photosensors. In these situations, they can be used most successfully with stepped switching (see above) to turn off some lights in a multilamp fi xture, if adequate daylight is present.
  • Photosensor : Uses continuous sensing of available light to control fluorescent electronic - dimming ballasts and adjusts the electric - light levels, based on a predetermined light level. The system needs to be custom designed, is complex, requires detailed commissioning, and is difficult to maintain, but it is effective in saving energy. Most photosensors have important adjustments for time delay, response speed, and response sensitivity. Small individual sensors are being integrated into individual luminaires, promising even more refi ned control in the future. Two types of photosensor systems are used:

1.     Interior closed loop: The sensor looks into the space it controls, registering the sum of daylight and electric light in its sensing range. Using direct feedback, a single sensor can control only a small number of luminaires in a relatively small space. In addition to use in daylighting - control strategies, this sensor is used for tuning, lumen maintenance, and adaptation - compensation strategies.

2.     Interior open loop: The sensor looks out the window or skylight from a location remote from the space being illuminated. With remote sensing, a single sensor can control multiple luminaires in large areas.

Special considerations and cautions related to photosensor applications include:

  • Sensors respond to refl ectance changes, including a person wearing white clothing.
  • Some sensors respond to spectral cues and should be matched to the visual - response curve (which peaks around 550 nanometers).
  • Closed - loop sensors need to be placed so that they read the task surfaces, rather than open areas.
  • Both sensors and photocells need to be shielded from direct light of the fixtures they are controlling as well as direct sunlight and bright skies.

6. Adaptation compensation responds to the human visual system and the adjustment of the eye to changes in light levels. Lower interior light levels at night are more comfortable and safer, since the eye does not have to adapt as much, especially when going from light to dark. This strategy is useful for saving energy at night, but it should only be used in areas that operate outside of daylight hours and where no critical visual tasks occur during these hours. Devices appropriate for this strategy include stepped switching and continuous dimming with photocells (see above.)

7. Demand limiting or load shedding is an economic response to energy availability and unit cost. During electrical emergency – alert periods, the automatic dimming of light levels and turning off unnecessary lights can help avoid brownouts. With advance recording systems, the total electricity demands of a building can be monitored and reduced when kilowatt costs temporarily rise during peak demand periods of a day.

8. Lumen maintenance aims to maintain an even light level over the life of a group of lamps. A reduced - light (or dimmed) level is used when lumen output of new lamps is higher than needed. As the lamps age and their lumen output decreases, the power is gradually increased to full range. With advances in lamp technology, there is currently minimal light depreciation for most lamp sources. Thus, the use of this strategy is generally not economically viable.

Lighting - control systems link together devices that determine the need for light (sensors) and the supply of power to the luminaires. Logical devices that integrate information signals from various devices may be part of the system. The simplest system combines devices in a local area or single space. Combining these local systems with a central computer and master control station expands the control to a whole building system. Combining the light - control strategies discussed above into an integrated system results in the maximum energy savings.

Other electric systems may also be controlled by this integrated building - automation approach. So - called smart buildings integrate other electrical systems (e.g., motorized shades, fans, air - conditioning and heating, and possibly security and alarm) with the lighting system. These total building systems are called energy - management systems (EMS) or building - automation systems (BAS). They have the ability to sense environmental conditions: time, amount of light, temperature, and air quality. Additionally, they can sense human intervention: occupancy or motion. These systems involve central or building protocol with a computer network – control system to communicate information between components in the system, which provides the potential of substantial energy savings (Center for Building Performance and Diagnostics n.d).

The central system information carrier can be a low - voltage or relay system (operatesa relay inserted in a luminaire power circuit), which uses small wire and consumes little electricity. One such system that communicates through low - voltage wire is DALI (digital addressable lighting interface); it communicates to luminaires and individual - control devices, and from lamps or ballasts. This international standard for ballast control is reducing the problem of incompatibility between controls and ballasts.

Another information - carrier system option is a power - line or carrier - current system, which uses the building wire system to send high - frequency signals, thus offering a low - cost system with great fl exibility. But this option is subject to interference and malfunction without the installation of special additional electrical components. The third and newest system uses radio frequency for communication. Wireless Mesh (ZigBee) and WiFi are two such systems.

Location options for the processors needed for the controls are: (1) local, next to device controlled; (2) central, utilizing a computer network – control system; and (3) distributed, decisions locally programmed but run centrally (unit failure affects only unit, not whole system).

The decision process for selecting a control system is based on occupant’s needs, type of space use and functional needs, energy rates, and an electricity - use profile. Daylighting potential is also a factor. For straightforward projects, a decision model is available. For more complex situations, an economic - payback analysis is appropriate.

Commissioning is another key step in achieving the energy efficiency and effectiveness of an advanced control system. This is the process of tuning, calibrating, and adjusting the devices to be sure they work appropriately for the installation requirements and at peak performance levels. The time and expense of this critical task is being managed by computerized monitoring components. Commissioning is required in a project seeking LEED certifi cation.

Computer programs are available to assist designers in developing daylight/electric - light layouts, including quantifying relative energy savings, modeling annual daylighting characteristics in a particular location, and sensor placement. One recent tool, Sensor Placement + Optimization Tool, or SPOT, was developed as part of California ’ s Public Interest Energy Research (PIER) Program Lighting Research Project (LRP). While initially developed for classroom daylighting, it is useful for other types of spaces.

A more comprehensive discussion of the increasingly complex array of control devices and systems is beyond the scope this discussion. Detailed information can be found in four sources: Lighting Controls: Patterns for Design; IESNA Lighting Handbook; Advanced Lighting Guidelines; and the Lighting Controls Association Web site ( www.aboutlightingcontrols.org ). In making a decision about using any lighting - control strategy, an analysis of the life - cycle cost of the controls (unit, installation, electricity, and maintenance) needs to be weighed against the energy savings from using the system. Within the context of ERLD, these decisions will affect both the energy efficiency and effectiveness of interior lighting.